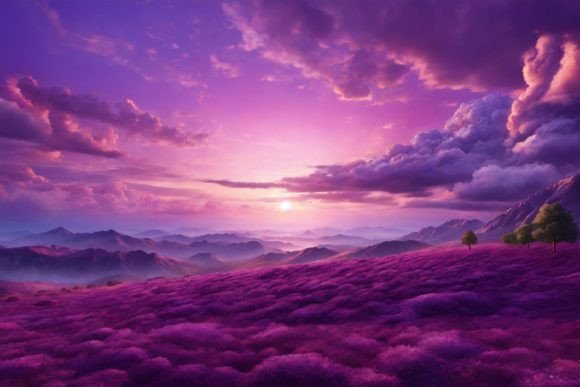
Integrating Sunset Sky Backgrounds into Professional Creative Workflows
In the realm of digital design and content creation, the choice of a background asset is rarely just an aesthetic decision; it is a foundational element that dictates the mood, readability, and overall success of a project. A Sunset Sky Background serves as more than mere decoration. It acts as a versatile canvas that can elevate everything from corporate presentations to artisanal product packaging. Understanding how to effectively integrate this specific type of imagery into your workflow requires a shift in perspective—viewing the asset not as a static image, but as a dynamic tool that interacts with typography, layout structures, and brand identity.
The utility of a high-resolution sky image lies in its adaptability. Whether you are a marketer designing a social media campaign, a small business owner creating printable wallpapers, or a graphic designer working on complex 3D model textures, the process begins with selecting the right resolution and color profile. This article explores the practical implementation of sunset sky assets, focusing on preparation, compatibility, and efficient execution across various mediums.
Preparation and Technical Compatibility
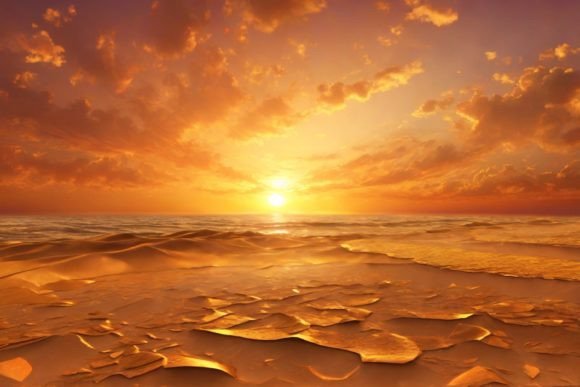
Before integrating a Sky Background into any project, technical due diligence is essential. The difference between a amateurish output and a professional result often comes down to file specifications. For the asset described here, the key parameters are a resolution of 300 DPI (dots per inch) and dimensions of 3000x2000 pixels in RGB color mode.
DPI and Print Readiness
For professionals involved in printing, such as those creating invitations, greeting cards, or wrapping paper, the 300 DPI specification is non-negotiable. Lower resolutions may appear acceptable on a screen but will result in pixelation and blur when printed. By starting with a high-DPI JPG file, you ensure that the gradient transitions in the sunset remain smooth, preserving the subtle shifts in orange, purple, and blue hues that define the image’s emotional impact.
Color Mode Considerations
Most digital workflows operate in RGB (Red, Green, Blue), which is ideal for websites, blog backgrounds, and digital scrapbooking. However, if your final output involves physical packaging or fashion projects intended for offset printing, you must consider color conversion. While the source file is RGB, understanding how these colors translate to CMYK (Cyan, Magenta, Yellow, Key) is crucial for maintaining consistency. Testing a small print run or using soft-proofing tools in software like Adobe Photoshop or Illustrator can prevent unexpected color shifts during the production phase.
Workflow Integration for Digital Content Creation
For bloggers, marketers, and web designers, the Sunset Sky Background offers a immediate solution to the common problem of visual fatigue. Plain white or gray backgrounds can feel sterile, while overly complex patterns distract from the core message. A sky backdrop provides a natural balance.
- Blog and Website Headers: Use the sky image as a full-width header. To ensure text readability, apply a semi-transparent overlay or use CSS gradients that darken the lower portion of the image where the title sits. This technique maintains the visual appeal of the sunset while adhering to accessibility standards for contrast.
- Social Media Graphics: When creating posts for platforms like Instagram or LinkedIn, crop the 3000x2000 image to fit square or vertical formats. The high resolution allows you to zoom in on specific cloud formations or color gradients without losing quality, giving each post a unique look derived from the same source asset.
- Digital Scrapbooking: Hobbyists and digital artists can use the sky layer as a base for collage work. By utilizing blending modes such as "Overlay" or "Soft Light," you can merge photos of people or objects seamlessly into the sunset environment, creating cohesive memory pages or artistic compositions.
The key to efficiency here is organization. Store your sky backgrounds in a dedicated asset library tagged by color tone and mood. This allows for rapid retrieval during tight deadlines, ensuring that the creative process is not stalled by searching for the right visual element.
Application in Physical Product Design
Beyond the screen, the versatility of this asset shines in physical applications. The process of adapting a digital sky image for tangible products involves careful attention to scale and repetition.
Packaging and Wrapping Paper
When designing wrapping paper or product packaging, the continuous nature of a sky gradient is advantageous. Unlike patterned designs that require precise tiling to avoid visible seams, a sunset sky can be stretched or repeated with minimal visual disruption. For large-format printing, ensure that the 3000x2000 pixel dimension is sufficient for the print size. If scaling up significantly, use intelligent upscaling tools or vector-based tracing methods to maintain sharpness, although the natural softness of clouds often forgives minor resolution limitations.
Home Decor and Printable Wallpapers
For entrepreneurs selling printable wallpapers or home decorations, the emotional resonance of a sunset is a strong selling point. The implementation workflow involves providing customers with multiple aspect ratios. Since the original file is 3:2, you may need to create cropped versions for standard phone screens, tablet backgrounds, and desktop monitors. Offering a bundle that includes these variations adds value and reduces customer support queries regarding formatting.
Advanced Techniques: Clipping Masks and 3D Textures
For graphic designers and 3D artists, the Sky Background serves as a critical component in more complex technical processes.
Clipping Masks on Text Shapes
One of the most effective ways to utilize this asset is through clipping masks. By placing the sky image inside bold, sans-serif typography, you create a striking visual effect where the sunset appears to be contained within the letters. This technique is particularly effective for headlines on posters, book covers, and invitation cards. The workflow involves:
- Creating a text layer with high-contrast font.
- Placing the sunset sky layer directly above the text.
- Applying a clipping mask so the image only appears within the boundaries of the letters.
- Adjusting the position of the sky layer to highlight the most vibrant part of the sunset within the text.
Texture for 3D Models
In 3D modeling and rendering, skyboxes or environment maps are essential for realistic lighting and reflections. A high-resolution JPG of a sunset can be mapped onto a spherical environment to simulate natural lighting conditions. This affects how materials like glass, metal, or water reflect their surroundings. For content creators working in Blender, Maya, or Unreal Engine, importing this asset as an HDRI (High Dynamic Range Image) equivalent or a standard texture map can drastically reduce render times compared to calculating complex light sources manually.
Quality Control and Long-Term Usability
Maintaining a consistent quality standard across all projects requires regular review of your assets. Over time, design trends shift, and what was once a popular aesthetic may become dated. However, natural elements like sunsets possess a timeless quality. To maximize the long-term usability of your Sunset Sky Background:
- Archive Originals: Always keep the original 300 DPI JPG file untouched. Create copies for editing to prevent generational loss from repeated saving and compression.
- Document Usage Rights: If you are using this asset for client work, ensure that the licensing allows for commercial use, especially for products like fashion projects or packaging where the image is a primary feature.
- Test Across Devices: For digital applications, preview the background on multiple devices. Colors can vary significantly between OLED screens and standard LCD monitors. Adjust brightness and saturation if necessary to ensure a consistent experience for all users.
In conclusion, the integration of a Sunset Sky Background into your creative toolkit is a strategic move that enhances both efficiency and aesthetic quality. By understanding the technical specifications, preparing files correctly for their intended medium, and applying advanced techniques like clipping masks and 3D texturing, you can unlock the full potential of this versatile asset. Whether for digital content, physical products, or complex design mockups, the process remains rooted in careful planning and precise execution.